 |
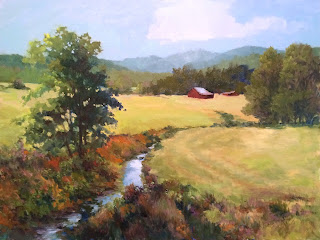
Valley (in progress name) 24"x30"
As it is before fresh eyes this morning! |
|
|
There are many times I have a vision of a scene I want to create. I will go through some photos and plein air pieces to come up with some references that I can use to jog my memory. Crazy right? Well, this painting has been worked on for about three different days, with some days where I did not get to work. I have posted a few of the "in progress" shots on Instagram which then gets shared to my Facebook page. Several have made comments, and when I posted the first stage (which is coming up) I was asked to please show the progress shots. I will say there was a stage I was working on in the ravine/creek area that did not get a photo, before I scraped it out and stopped for the day to come back the next one and start again.
The beginning shots of laying in the idea!
 |
| Step #1 |
 |
| Step #2 |
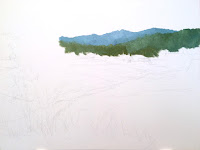
Step #1 drawing with pencil very lightly to give me a road map. And then a start with the distant plane... the mountains!
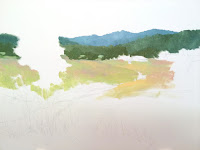
Step #2 Here I am adding colors in the pasture, creating the negative image of a tree, combining peach and ochre mixtures with light green mixture, so I could have a pasture with "character" and not a flat color.
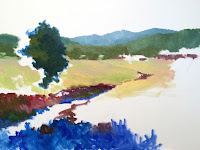
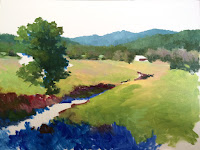
Step #3 I have just moved down the canvas getting a
layer of some colors and values and shapes. This helped create the
stream bed, a slight ravine and the bushy stuff at the bottom... and the
dark side of the tree.
 |
| Step #3 |
 |
| Step #4 |
I like using Ultramarine Blue and Permanent
Alizarin Crimson as underpainting colors for my darks. The green tree
actually started out with the Ultramarine Blue as its under color.
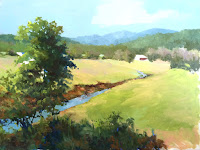
Step #4 I continue adding the pasture colors, and more greens into it as it progresses forward. My greens are a combination of Ultramarine Blue and either Cad. Yellow Med. or Cadmium Lemon. I adjust those, adding some modifying colors to knock them down a little. I'm also beginning to play with what are the trees and stuff coming toward us from the background. I introduced some trees that have a lavender in them... could be trees that are losing their foliage for some reason.
 |
| Step #5 |
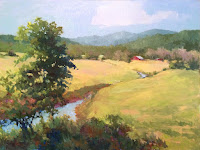
Step #5 is trying to cover all the white of the canvas except the little barn in the distant middle ground. I added the sky colors, leaving a light section to become a cloud, and also put that sky color in the creek. I have the bank of "Georgia red clay" on the shadow side of the creek... a small ravine. And, I have added more to the tree and little bush, foreground foliage values and colors.
 |
| Step #6 |
 |
| Step #7 - grey scale |
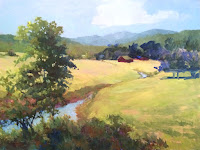
Step #6 This is the image after I had scraped off lots of "nit-picky" foliage in the ravine area of the creek. I had spent a lot of time on creating what you see growing down in those little creeks that snake their way through a pasture. Well, I didn't like it, so I used my palette knife and scraped! This is the image after that, but I have added more color to the little barn, and changed some of the colors in the pasture. I have also changed the distant course of the creek and the near part as it comes to the foreground foliage. And here, on the right,
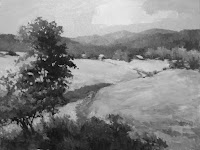
Step #7 is a grey scale ... values only with no color.
 |
| Step #8 |
Step #8 Here I have scraped out the middle distance... the barn and trees... adding the barn a little more forward and just slightly larger, and creating a bank of darker blue to build some trees on behind the barn. The right side I have changed those lavender trees to a larger shape and a little more forward.
 |
| Step #9 |
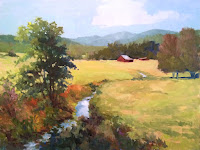
Step #9 ... here I have added the colors to the trees behind the barn, worked on the pasture, and am changing the shape and direction of the creek again! And, I have moved the tree from the bottom on this side of the creek to the other bank... other side of the creek.
When you are not pleased, be fearless and make a change, even a significant change. I have developed a work method of "thinking" this is only me trying to learn, be a better more thoughtful painter even when deciding to scrap off! Why am I scraping off? Make decisions based on your knowledge when you are backed away and sitting on your stool. A mentor of mine, Duane Wakeham, ld me I needed to spend more time sitting on the stool, and a little less time painting... he knew I am prolific!
It still does not please me... so,
Step #10, I have added to the middle trees, putting shadows under them, etc. I have changed the creek bank more, and worked in the foreground. So here is another photo after reading this long post and looking at all the progress shots... of the image at the top... where it stands as of writing this post. That does not mean I won't change it when I make it back to the studio this afternoon, or tomorrow.
 |
| Step #10 |
I hope you have enjoyed coming along with me on this journey of starting, changing, working, changing, and hopefully getting toward the end of a 24"x30" oil painting! Work some from your memory, have things sitting around that will inspire you, things that will give you ideas, etc. But, be creative and unafraid! One of my favorite sayings is, "Crash and Burn" if you need to do so. You might not be glad you did.


